Connectivity
Applications require notifying users when the state of their connection changes. One way of doing so is to make use of snackbars to inform users as shown in this article. In this example, we see how this can be accomplished by making use of reactions.
Install the connectivity plugin
The first step is to install the connectivity plugin:
 . Your application's `pubspec.yaml` file will look similar to the following
dependencies:
  connectivity:
The ConnectivityStore
We now need to define our Store to hold our reactive state that represents the
connection status of the device being used to run the application.
import 'package:mobx/mobx.dart';
import 'package:connectivity/connectivity.dart';
part 'connectivity_store.g.dart';
class ConnectivityStore = _ConnectivityStore with _$ConnectivityStore;
abstract class _ConnectivityStore with Store {
ObservableStream<ConnectivityResult> connectivityStream =
ObservableStream(Connectivity().onConnectivityChanged);
void dispose() {}
}
The ConnectivityStore has a field named connectivityStream. It is an
ObservableStream that wraps around a stream provided by the connectivity
plugin that can be used to listen for changes in connection state. By doing so,
we can make use of reactions to respond to changes as we shall soon see. Without
MobX, this would generally have been done by
listening to the stream.
Setting up the reaction
To have our user interface inform users of changes about the state of their
connection, we'll need to configure a reaction. We will use the
ReactionBuilder for this as it simplifies the setup of the reaction and takes
care of cleaning it up, when the widget is disposed.
import 'package:connectivity/connectivity.dart';
import 'package:flutter/material.dart';
import 'package:flutter_mobx/flutter_mobx.dart';
import 'package:mobx/mobx.dart';
import 'package:mobx_examples/connectivity/connectivity_store.dart';
class ConnectivityExample extends StatelessWidget {
const ConnectivityExample(this.store, {Key? key}) : super(key: key);
final ConnectivityStore store;
Widget build(BuildContext context) => ScaffoldMessenger(
child: ReactionBuilder(
builder: (context) {
return reaction((_) => store.connectivityStream.value, (result) {
final messenger = ScaffoldMessenger.of(context);
messenger.showSnackBar(SnackBar(
content: Text(result == ConnectivityResult.none
? 'You\'re offline'
: 'You\'re online')));
}, delay: 4000);
},
child: Scaffold(
appBar: AppBar(
title: const Text('Settings'),
),
body: const Padding(
padding: EdgeInsets.all(16),
child: Text(
'Turn your connection on/off for approximately 4 seconds to see the app respond to changes in your connection status.'),
),
)),
);
}
The ConnectivityStore is passed to the ConnectivityExample widget, which can
be done through the 
A reaction is used here as we are only interested in
letting users know when the connection state changes. The value passed as the
first argument to the reaction function represents reactive state that needs
to be tracked i.e. the status of the user's connection. The second argument
represents the code that we want executed whenever the reactive state changes.
In this example, we want a snackbar displayed to notify users about updates to
their connection status. In areas where connections can repeatedly drop in and
out, it may be desirable to avoid showing too many messages that would otherwise
degrade the user experience. To solve this problem, the reaction function
allows specifying a delay in milliseconds. In this scenario, we have specified
a delay of 4000 milliseconds (i.e. 4 seconds). The effect of this is that
the snackbar will only be shown if 4 seconds have passed since the status of the
user's connection has changed.
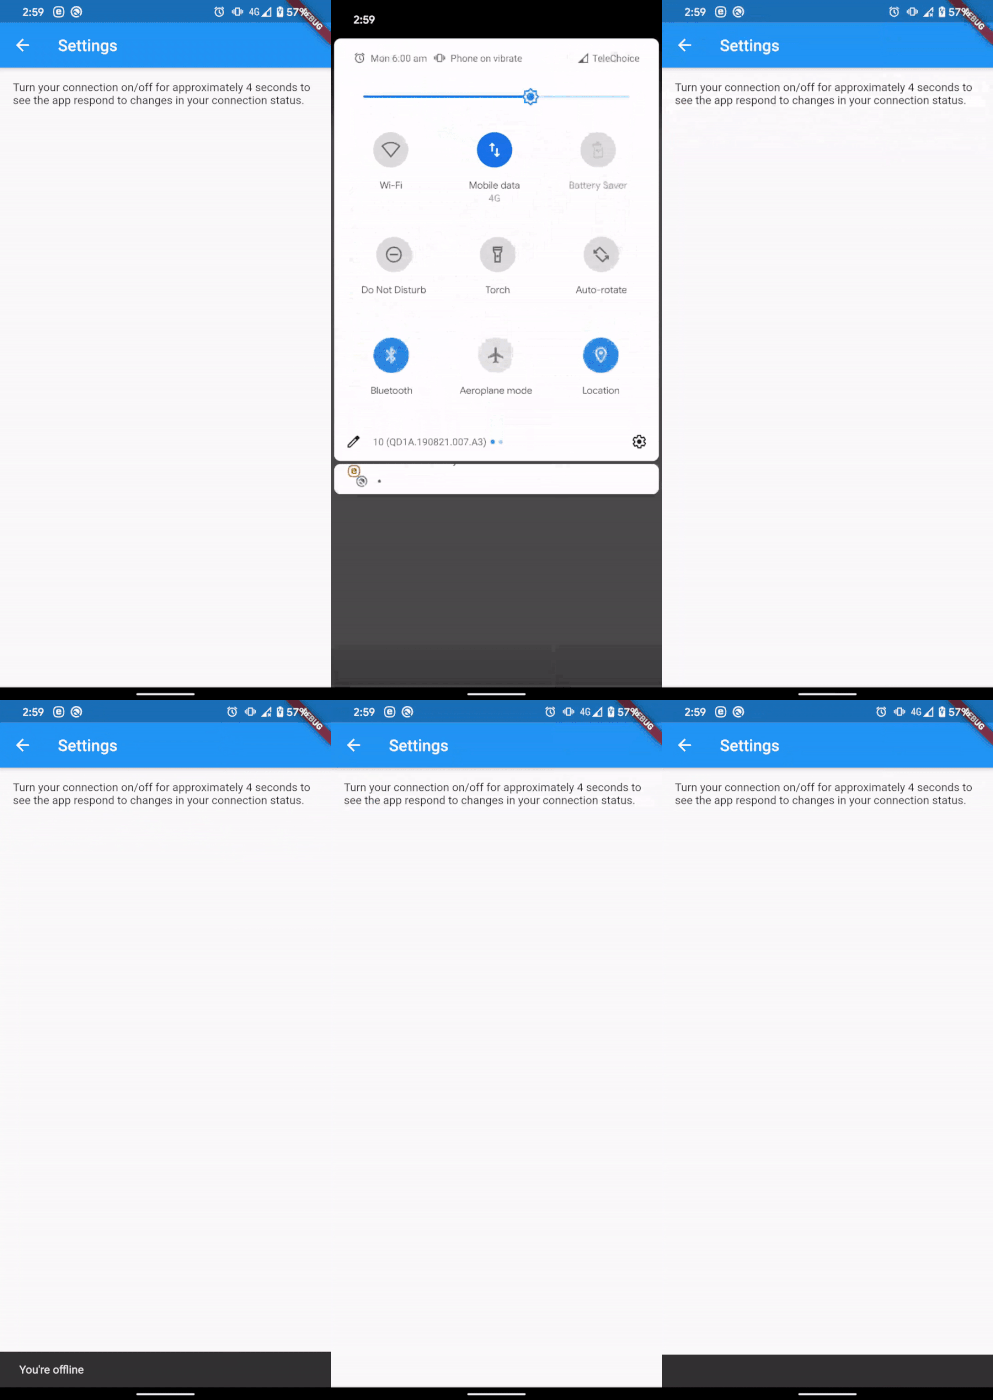
The end result looks like this

Summary
This example demonstrates how we can make use of reactions. Most of the time,
developers will be making use of the Observer widget. However, some scenarios
require displaying brief messages where the user interface elements aren't
actually returned by a widget's build method. MobX provides functions such as
reaction that are suitable for these scenarios that are simple to setup but
also provide powerful features such as the ability to apply a throttling delay.
Using the ReactionBuilder, it also simplifies setting up the reactions in
the Flutter widget tree.
The complete example can be seen here
